 Save
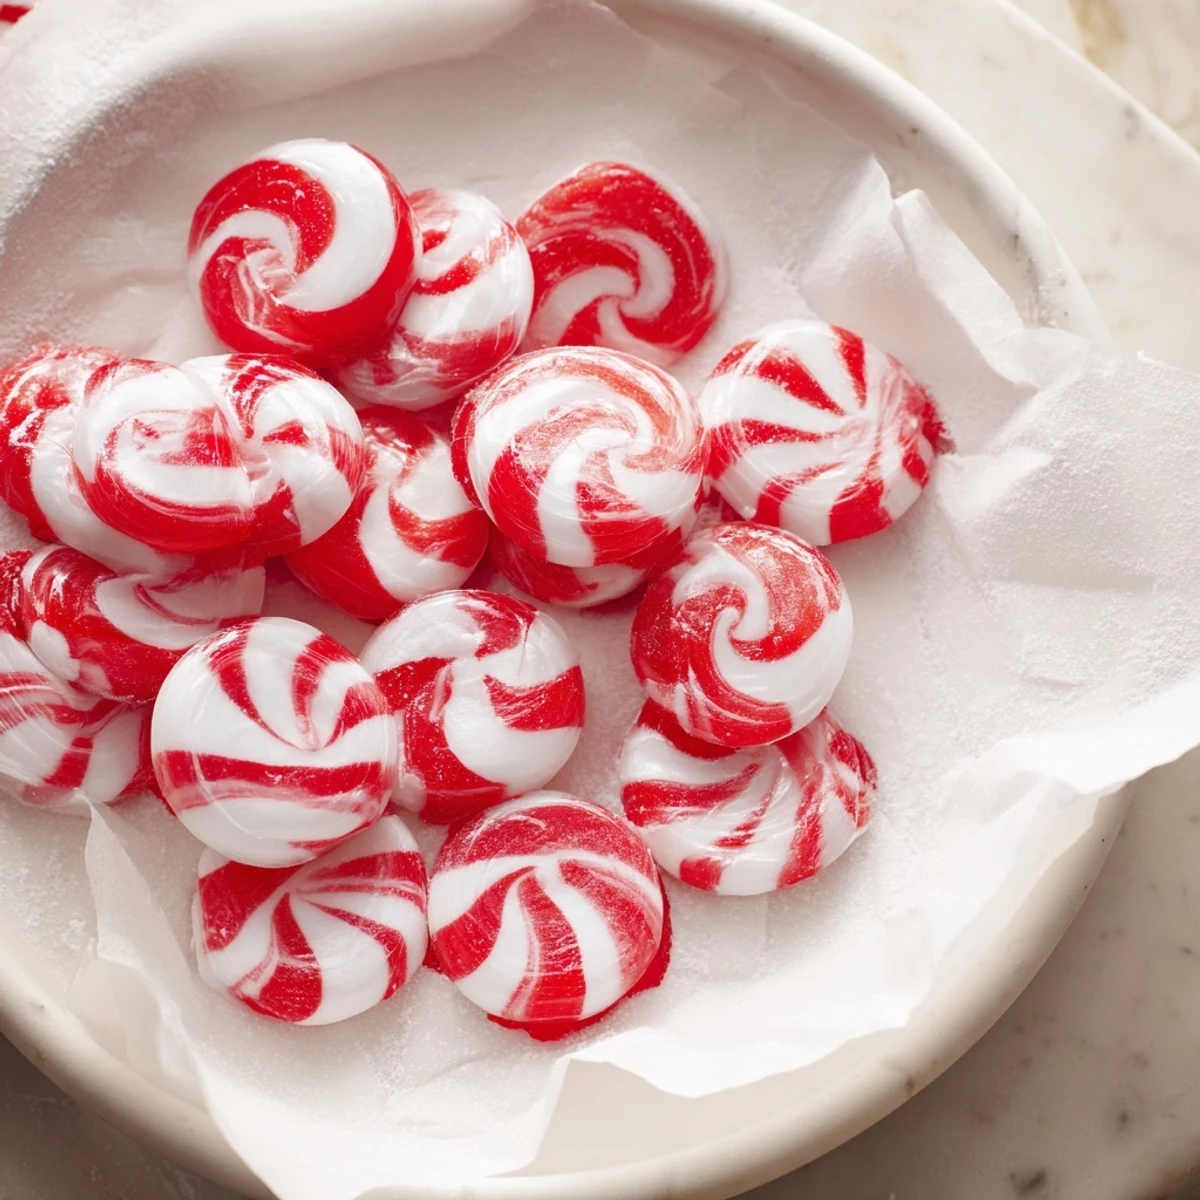
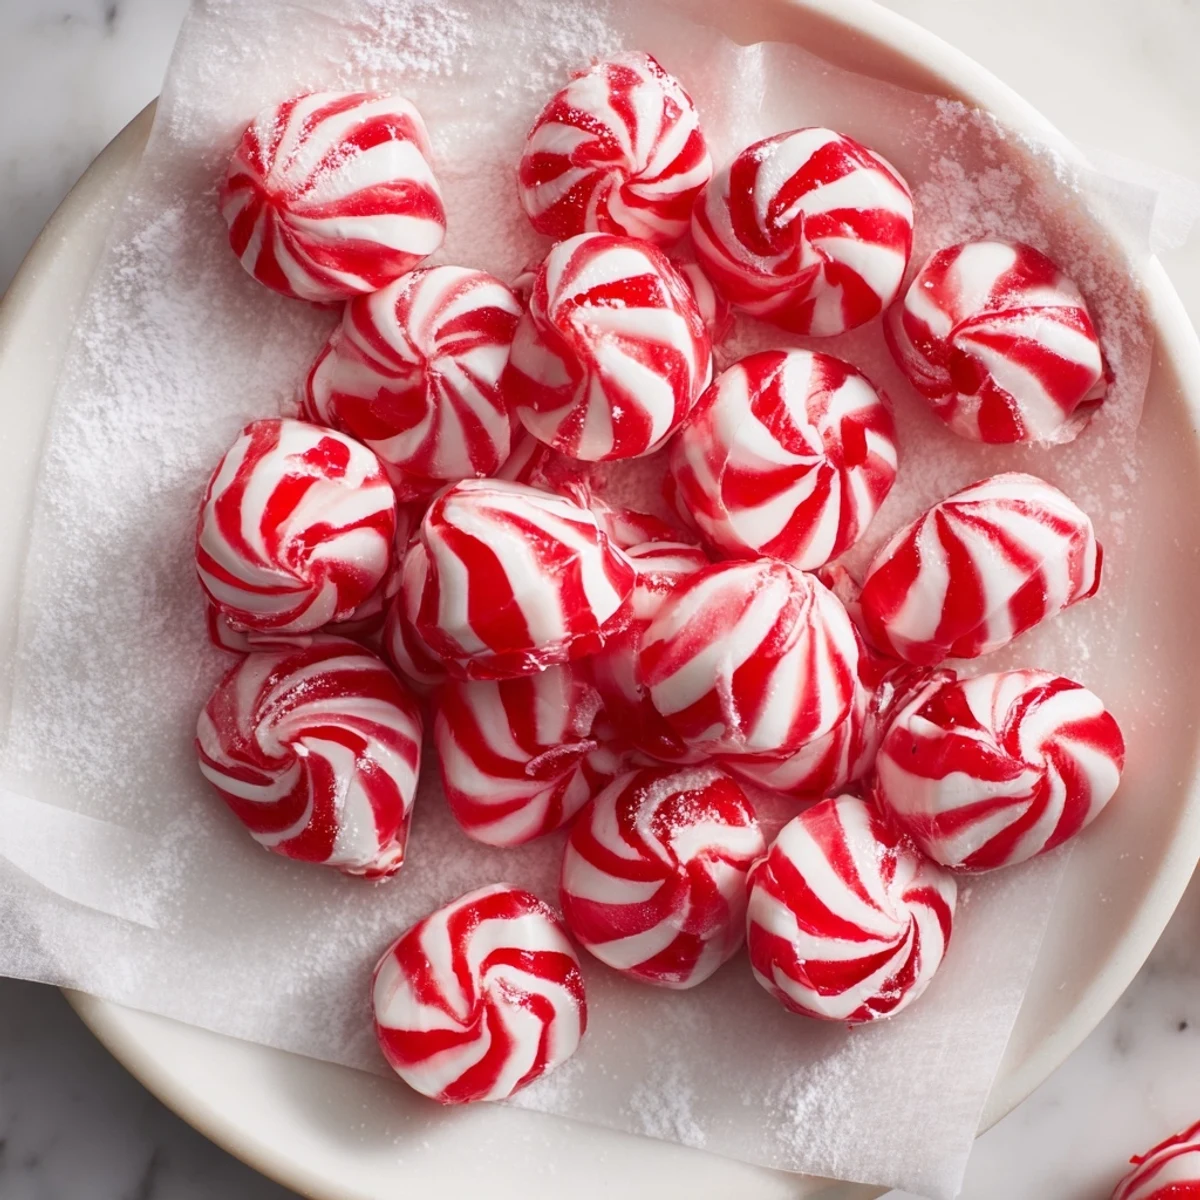
Save These classic peppermint twists feature vibrant red-and-white swirls that make them perfect for holiday celebrations and gifting. Made by heating a sugar syrup to the soft-crack stage, the mixture is flavored with peppermint extract before being pulled and twisted into ropes. The candies harden quickly after being cut into bite-sized pieces, offering a crisp and refreshing mint experience. Using simple ingredients like sugar, corn syrup, and peppermint extract, this process creates beautiful and festive confections suitable for vegetarian and gluten-free diets.
I still remember my grandmother's kitchen the week before Christmas, the whole house smelling like a peppermint explosion. She'd let me stand on a stool while she pulled hot candy, her hands moving with this practiced grace that made it look effortless. That moment of watching the red and white strands twist together felt like pure magic to a kid who thought candy only came from stores. Years later, I finally got the courage to make peppermint twist candies myself, and I realized she wasn't performing magic—she was just being patient with something that demanded precision and a little bit of confidence.
I brought a batch to my office party last year, and watching people's faces light up when they realized I'd made them by hand—not bought them—was worth every second of pulling hot sugar until my arms felt tired. One colleague actually asked if I'd gone to culinary school. I hadn't, just had a grandmother and a candy thermometer and a willingness to be a little bit brave.
Ingredients
- Granulated sugar (2 cups): This is your foundation—it needs to be pure and white so the colors show up beautifully. Avoid brown sugar here; it'll muddy your pristine red and white swirl.
- Light corn syrup (1/2 cup): This prevents crystallization and keeps your candy glossy and smooth. Don't skip it or use dark syrup—the chemistry matters and so does the appearance.
- Water (1/2 cup): Just enough to dissolve everything and get the cooking started. Too little and you'll have grainy candy; too much and you'll never reach that perfect hard-crack temperature.
- Cream of tartar (1/4 tsp): The secret weapon that stops unwanted crystallization. I learned this the hard way after my first batch turned grainy and sad.
- Peppermint extract (1/2 tsp): This is potent stuff—a little goes a long way. Use real extract, not imitation, if your budget allows. The difference is noticeable and worth it.
- Red gel food coloring: Gel works better than liquid because you won't dilute the candy. Start with a few drops; you can always add more to deepen the color.
- Powdered sugar (for dusting): This prevents sticking and gives your finished candies a subtle sweetness on the outside. It's not just decoration; it's functional.
Instructions
- Prepare your workspace:
- Line a large baking sheet with parchment paper and dust it lightly with powdered sugar. Have everything within arm's reach—oiled scissors, spatulas or heatproof gloves, your marble slab or heatproof surface. Candy waits for no one, and you'll move faster when you're not hunting for tools.
- Build your sugar mixture:
- In your heavy saucepan, combine the sugar, corn syrup, water, and cream of tartar. Stir over medium heat, watching as the sugar dissolves into a clear liquid. This should take about 5 minutes. You'll feel the texture change under the spoon—from sandy to smooth and glossy.
- Cook to the perfect temperature:
- Once the sugar is dissolved, stop stirring. Increase the heat to medium-high and let it boil. Insert your candy thermometer, making sure it doesn't touch the bottom of the pan. Watch it climb to 290°F (143°C)—this is the soft-crack stage. It'll take about 12-15 minutes. The mixture will go from clear to light amber; resist the urge to stir. Your patience here is everything.
- Add the peppermint magic:
- The moment the thermometer hits 290°F, pull the pan from heat. Add your peppermint extract and stir quickly but carefully—the mixture will smell absolutely incredible, and you might get a little peppermint-scented steam in your face, which is honestly one of life's simple pleasures.
- Pour and divide:
- Working quickly, pour half of the hot candy onto your greased marble slab or heatproof surface. Immediately add a few drops of red gel coloring to one portion; leave the other half plain white. The candy will still be quite hot and can cause serious burns, so move with purpose but not panic.
- Pull and cool:
- Wait about 2-3 minutes for the edges to set and the center to cool just slightly—you want it still pliable but manageable. Using oiled spatulas or heatproof gloves, start pulling each colored portion. This is actually meditative; the candy changes texture as you work it, becoming less sticky and more satiny.
- Create the signature twist:
- Once each portion is cool enough to hold its shape, pull each into a long rope. Then take your red and white ropes and twist them together in a gentle, spiral pattern. Don't overthink this—the beauty is in the imperfection.
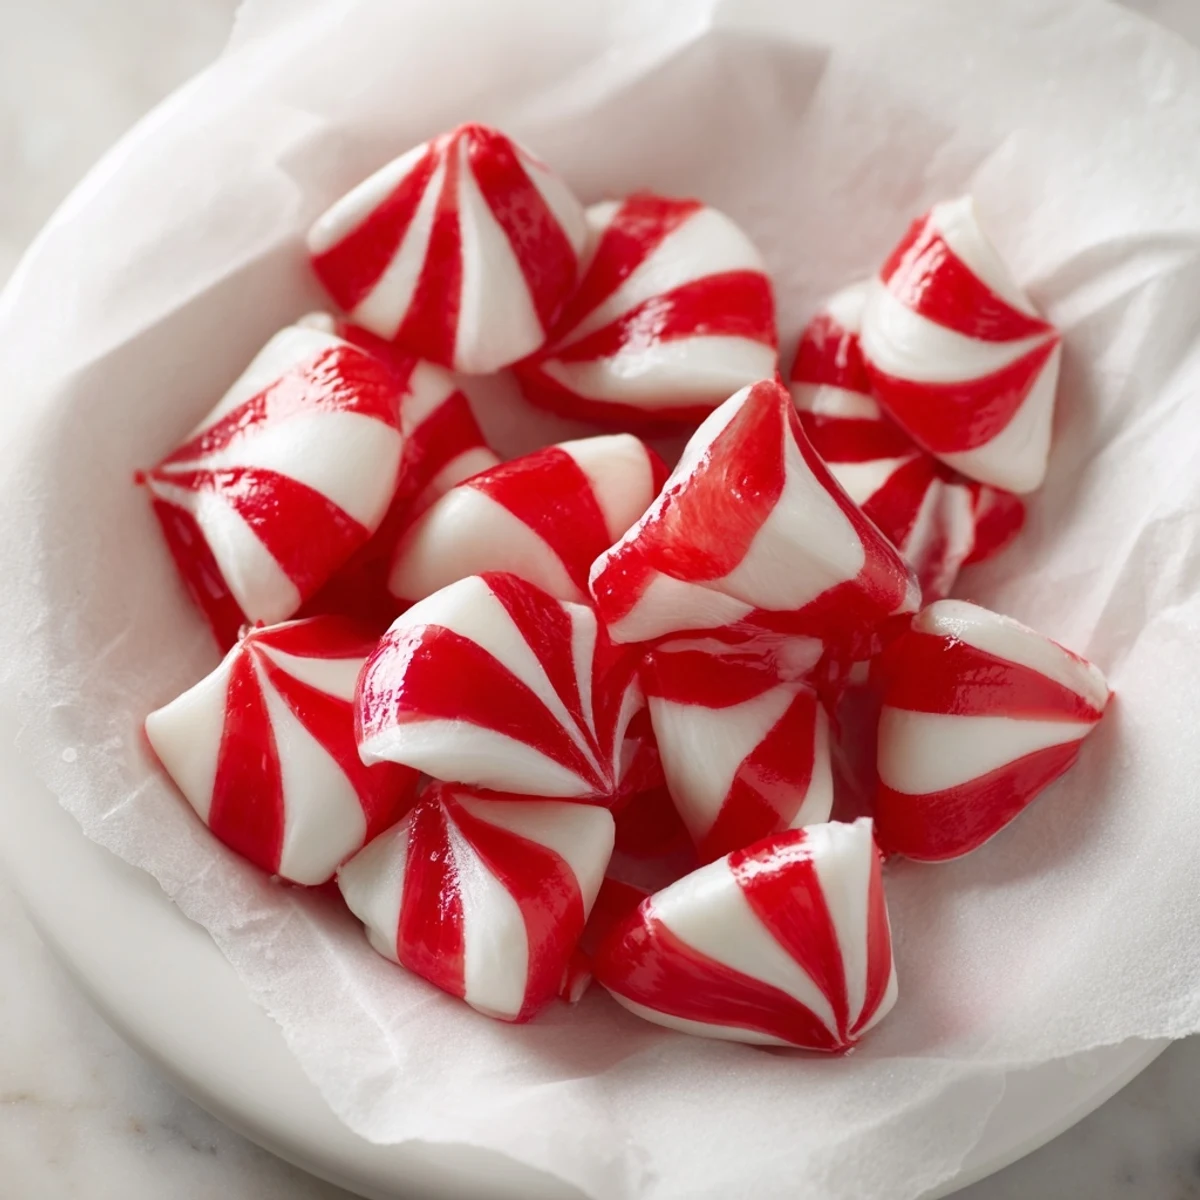
- Cut into pieces:
- Using oiled kitchen shears or sharp scissors, cut the twisted rope into 2-inch pieces. Oil your scissors between cuts so they glide through rather than pull. Place each piece on your prepared baking sheet.
- Final cool:
- Let everything rest at room temperature for 30 minutes to firm up completely. Resist the urge to taste one immediately—they're genuinely hot inside even though they look ready.
 Save
Save My sister brought her daughter over one December afternoon, and we made a batch together. My niece was five, so she mostly watched, but when we twisted those ropes together, she gasped like we'd performed a miracle. She ate one piece very slowly, closing her eyes between bites, and said, "This tastes like Christmas feels." I've made these candies dozens of times since, but that moment is still the best reason to make them.
The Art of Pulling Candy
Pulling candy is a dance between patience and timing. If you pull too soon, it'll stick to your gloves and tear into frustrating fragments. If you wait too long, it hardens and resists your efforts. There's a sweet spot—usually around 2-3 minutes—where the candy has just enough give to stretch without breaking. The first time you nail it, you'll feel like you've discovered something ancient and important. You haven't, but the feeling is real, and it makes the candy taste better.
Storing Your Candies
Once your candies are completely cool, store them in an airtight container at room temperature. They'll keep for two weeks, though they rarely last that long in my house. If you want to get fancy, wrap individual pieces in small squares of cellophane or wax paper. Twist the ends, and suddenly they look like something you'd buy at a fancy confectionery. Layered in a pretty box, these become the kind of gift that people remember and talk about.
Flavor Variations & Creative Possibilities
Once you master the red and white peppermint version, the recipe becomes a playground. You can use cinnamon extract for an autumn version, swap in almond extract for something delicate, or even try a wintergreen extract if you want to get adventurous. I've made a chocolate-peppermint version by adding cocoa powder to one portion—it's stunning and tastes even better than it looks. The same technique works beautifully with multiple colors. Don't limit yourself to red and white; try emerald green and white, or even gold and cream if you're feeling fancy.
- Always use gel food coloring over liquid for richer, truer colors
- Add extracts gradually and taste a tiny cooled piece before committing to the full batch
- Experiment with color combinations that feel personal to you—your candies should make you happy to look at
 Save
Save Making peppermint twist candies isn't difficult, but it demands attention and care. That's exactly what makes it worthwhile. Every batch becomes a small moment of intentionality in a rushed world, and every person who receives them tastes that effort and thoughtfulness.
Common Questions
- → What stage should the sugar reach for proper texture?
-
The sugar syrup should be cooked to 290°F (soft-crack stage) to ensure the candy hardens with the right crispness.
- → Can other flavorings be used instead of peppermint?
-
Yes, other extracts like cinnamon can be used to create different flavor variations.
- → Why is powdered sugar used during preparation?
-
Powdered sugar prevents sticking when pulling and twisting the candy ropes.
- → How should the candies be stored after cooling?
-
Store the candies in an airtight container at room temperature to maintain freshness.
- → What tools are essential for making these twists?
-
A candy thermometer, marble slab or heatproof surface, oiled spatulas or gloves, baking sheet, and sharp scissors are key tools.
