 Save
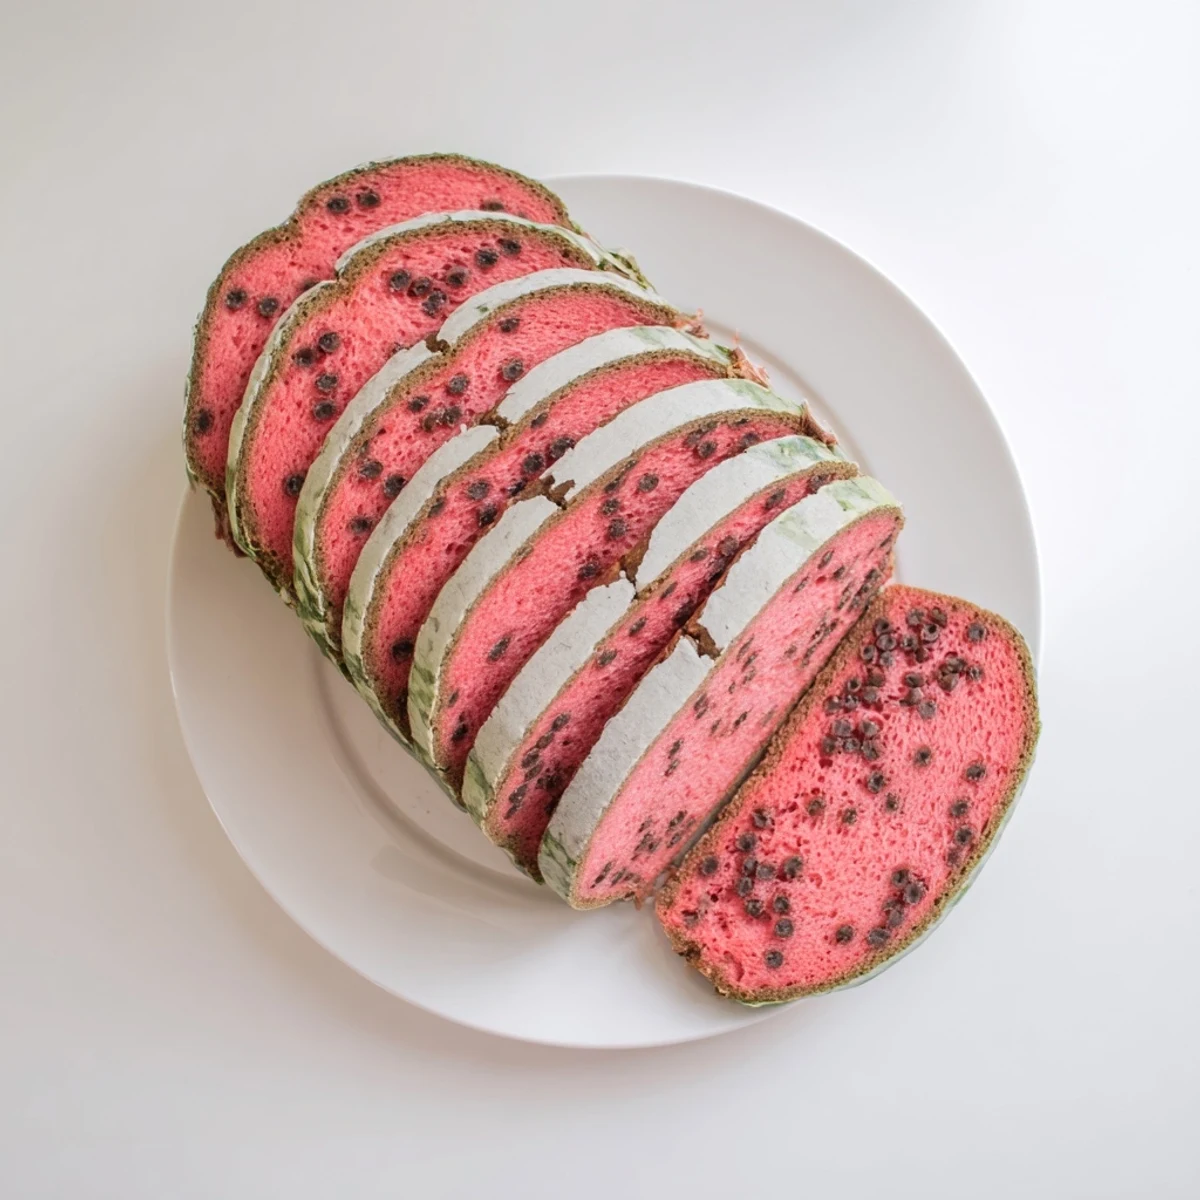
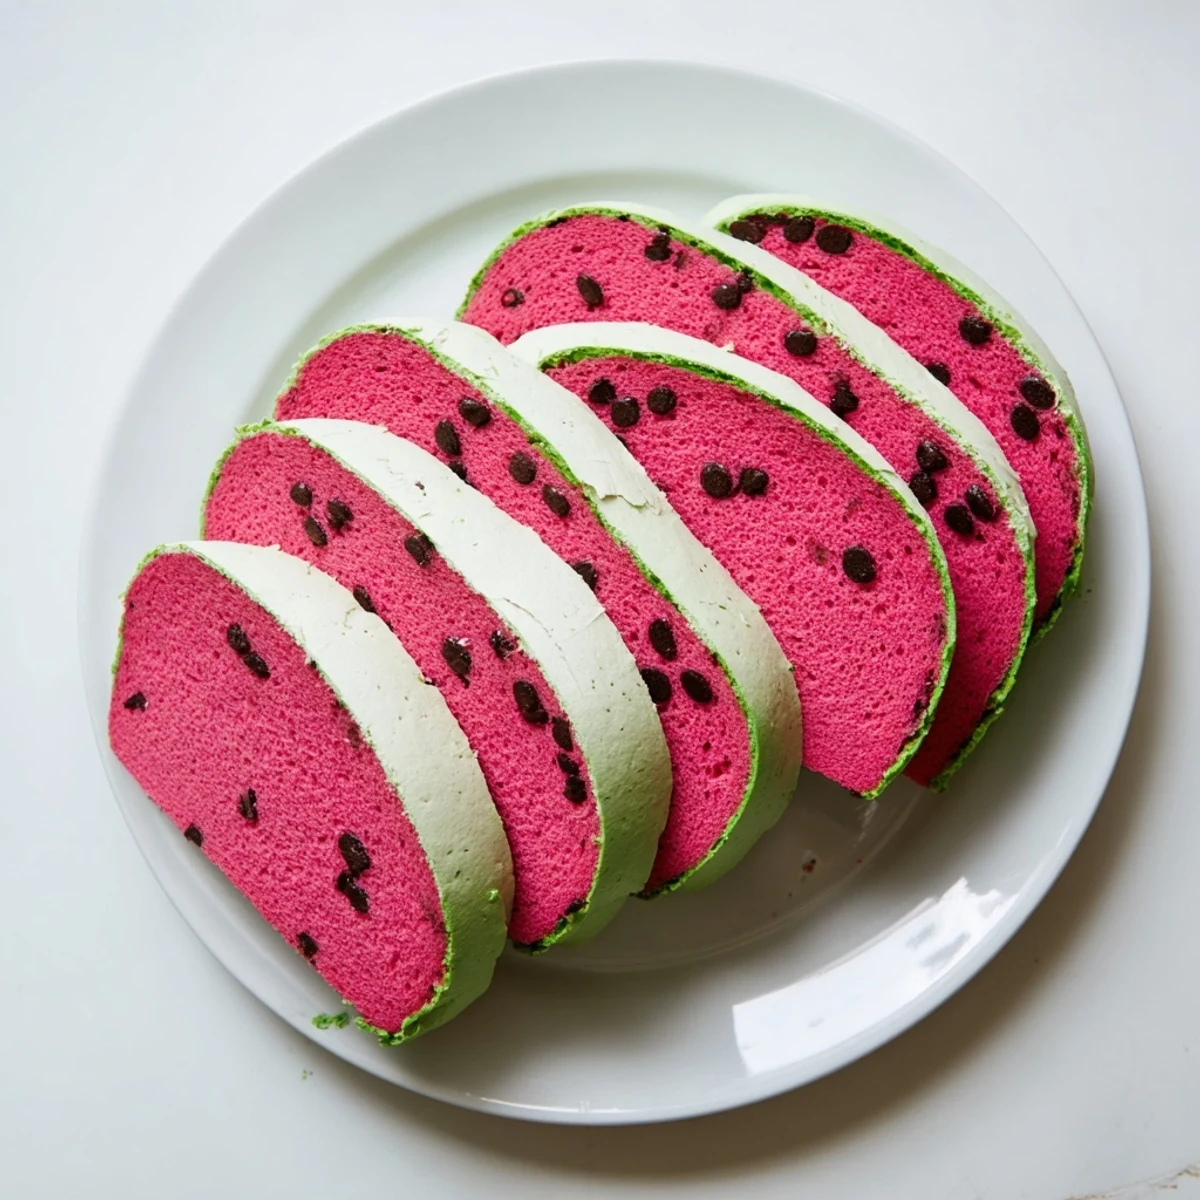
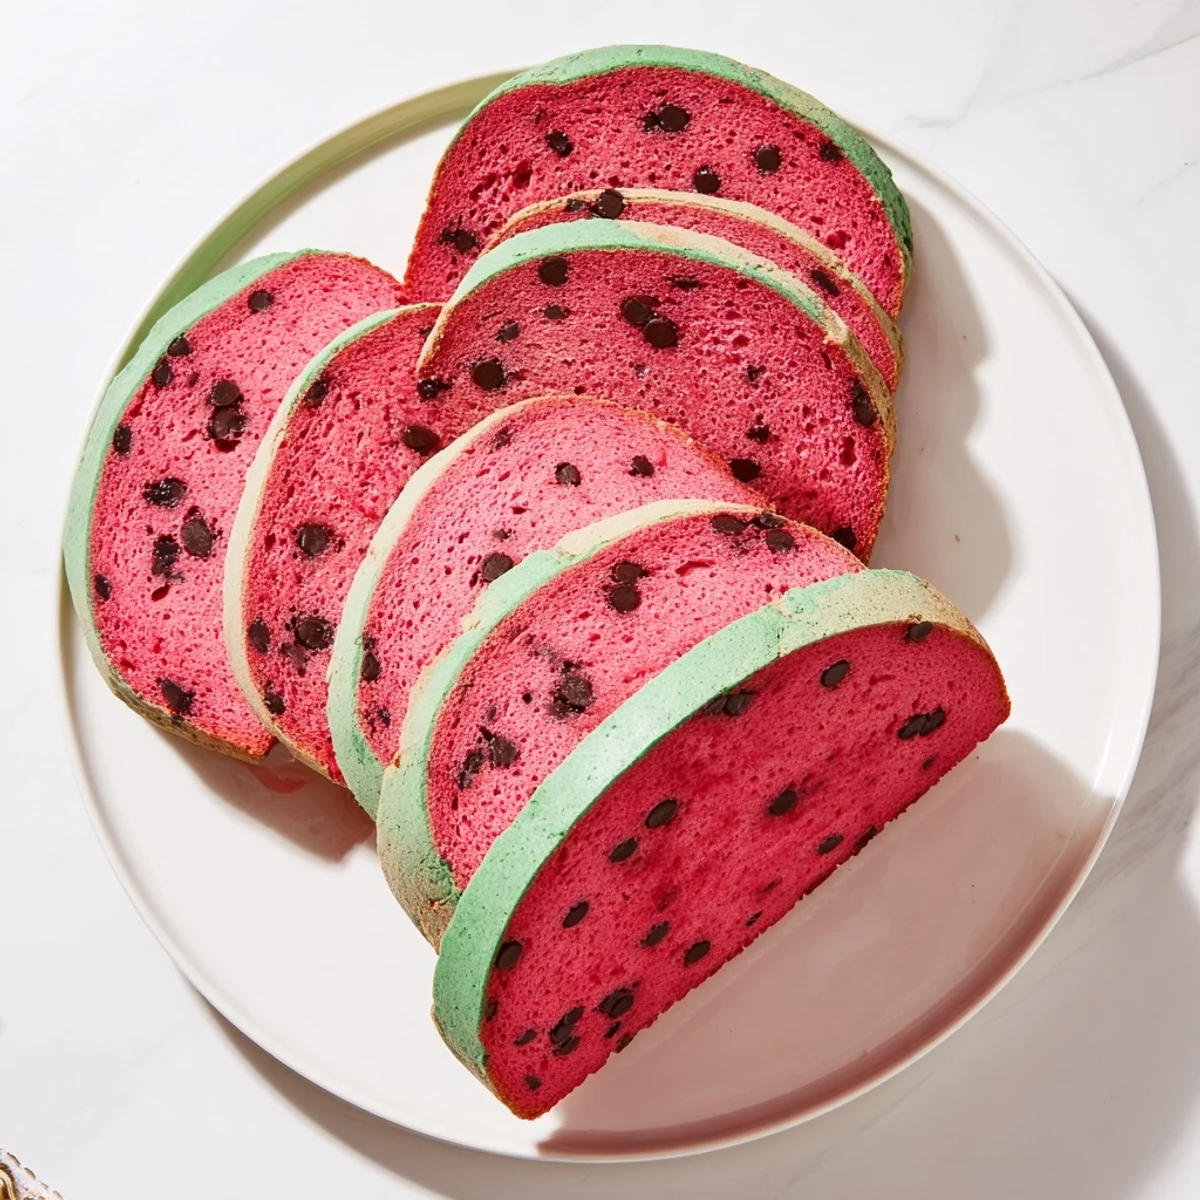
Save This eye-catching loaf captures the vibrant appearance of watermelon through three colored dough layers—pink flesh, white rind, and green skin. The result is a tender, slightly sweet bread that delivers both visual appeal and subtle fruity notes, perfect for summer entertaining.
The dough uses classic bread ingredients enhanced with food coloring and optional watermelon extract for authentic flavor. Mini chocolate chips create the signature seeded appearance, making each slice reveal a beautiful watermelon cross-section that delights both children and adults.
While the presentation is impressive, the process involves straightforward bread-making techniques including kneading, rising, and layering. The result produces ten generous slices perfect for toasting, serving with butter, or creating playful sandwiches.
The first time I brought this watermelon bread to a summer potluck, I actually had to convince people it wasn't some kind of dessert cake. Someone literally asked if it was cake disguised as bread, which I took as the weirdest compliment ever. The way those chocolate chips peek out when you slice through that bright pink crumb still makes me ridiculously happy every single time.
My youngest niece helped me make this last July and got so enthusiastic about kneading the red portion that she turned her hands completely pink for three days. She called it her watermelon warrior phase and now requests this bread every time she visits, claiming she's the only one who can properly distribute the seeds.
Ingredients
- Bread flour: Higher protein content gives you that tender but sturdy structure that holds up the layers
- Active dry yeast: Make sure your milk is warm but not hot or youll kill the yeast before it even gets started
- Unsalted butter: Softened to room temperature so it incorporates evenly into the dough
- Cocoa powder: Used sparingly in the red portion to deepen that watermelon color without adding chocolate flavor
- Matcha powder or green food coloring: Matcha gives a more natural green hue while food coloring pops brighter
- Mini chocolate chips: These are your seeds and they need to be mini so they distribute properly
Instructions
- Mix the dough base:
- Combine flour, sugar, yeast, and salt in your stand mixer then pour in warm milk, egg, and softened butter. Let the mixer work its magic for about 8 minutes until the dough is smooth and bounces back when you poke it.
- Divide and color:
- Split your dough into three portions with 60 percent for the red flesh, 25 percent for white rind, and 15 percent for green skin. Work red coloring and watermelon extract into the largest portion then gently fold in those chocolate chip seeds.
- Shape the layers:
- Flatten the red dough into a log the length of your loaf pan, wrap the white portion around it like a blanket, then envelope both with the green dough. Pinch all the seams really well so they dont split during baking.
- Rise and bake:
- Place your loaf seam side down in a greased pan and let it puff up for 30 to 45 minutes. Bake at 350 degrees for about 35 minutes, tenting with foil if the green starts getting too dark.
 Save
Save This bread became my go to for neighbors who moved in during summer months. Something about seeing those cross sections on a cutting board makes people feel immediately welcomed and like you put way more effort into their arrival than you actually did.
Getting The Colors Right
I learned the hard way that liquid food coloring can make your dough sticky and miserable to work with. Gel coloring or natural powders like matcha give you that intense color without messing up your dough texture. Start with less than you think you need because you can always add more but you cant take it back.
Shaping Secrets
The key to clean layers is making sure each portion of dough is roughly the same thickness before you start wrapping. If one section is too thick it wont bake evenly and youll end up with gaps between your colors. Think of it like rolling a really fancy colorful burrito.
Storage And Serving Ideas
This bread actually develops better flavor after sitting overnight because the watermelon essence has time to mellow into the dough. The texture also firms up slightly which makes for cleaner slices and better presentation.
- Toast slices and top with cream cheese for the most adorable summer breakfast
- Use slightly stale bread to make french toast that looks insane on the plate
- Wrap individual slices in plastic and freeze for up to a month
 Save
Save There is something deeply satisfying about cutting into this loaf and seeing those perfectly layered colors staring back at you. Every slice feels like a little summer celebration.
Common Questions
- → What does watermelon bread taste like?
-
The bread has a subtly sweet flavor with hints of fruitiness from the watermelon extract. The taste is similar to a soft, sweet milk bread rather than overpowering artificial watermelon flavor.
- → Can I make this without food coloring?
-
Food coloring is essential for achieving the distinctive watermelon appearance. Gel coloring works best for vibrant hues without adding excess liquid to the dough.
- → How long does watermelon bread stay fresh?
-
Store in an airtight container at room temperature for up to 3 days. The bread can also be frozen for up to 3 months—slice before freezing for easy thawing.
- → Is watermelon extract necessary?
-
Watermelon extract is optional and primarily enhances flavor. You can substitute with vanilla extract or omit it entirely—the bread will still have a pleasant, slightly sweet taste.
- → Can I use natural food coloring alternatives?
-
Matcha powder works beautifully for the green layer. For pink, beet juice or raspberry powder can provide natural color, though gel coloring typically yields more vibrant results.
- → Why is the total time longer than cooking time?
-
The total time includes two rising periods—about 1 hour for the initial rise and 30-45 minutes for the second rise in the loaf pan. These resting periods are essential for proper texture and volume.
