 Save
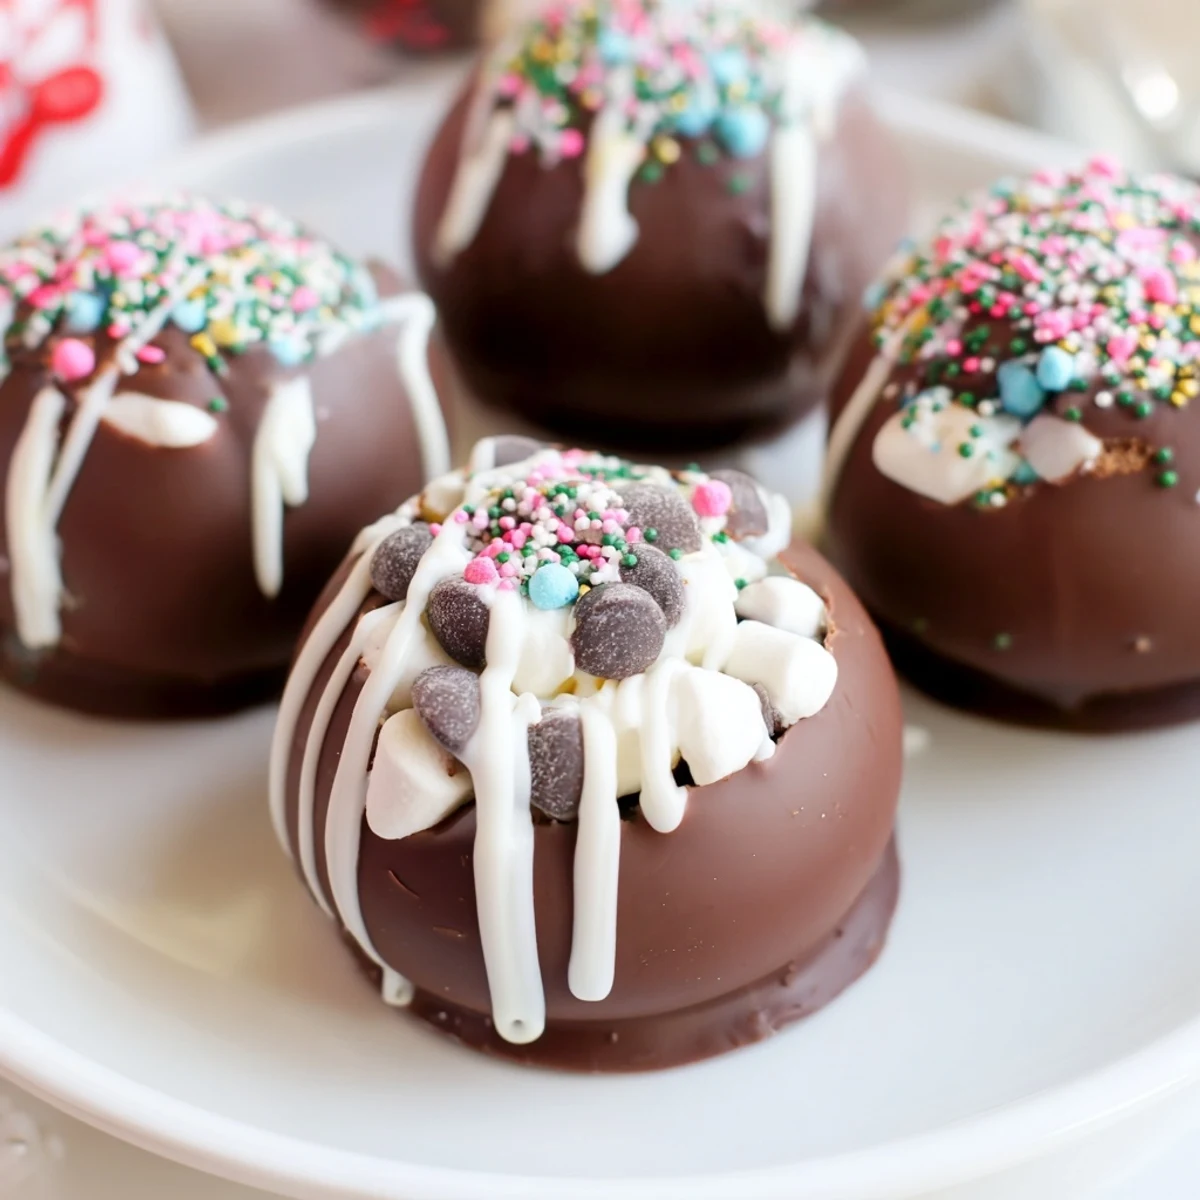
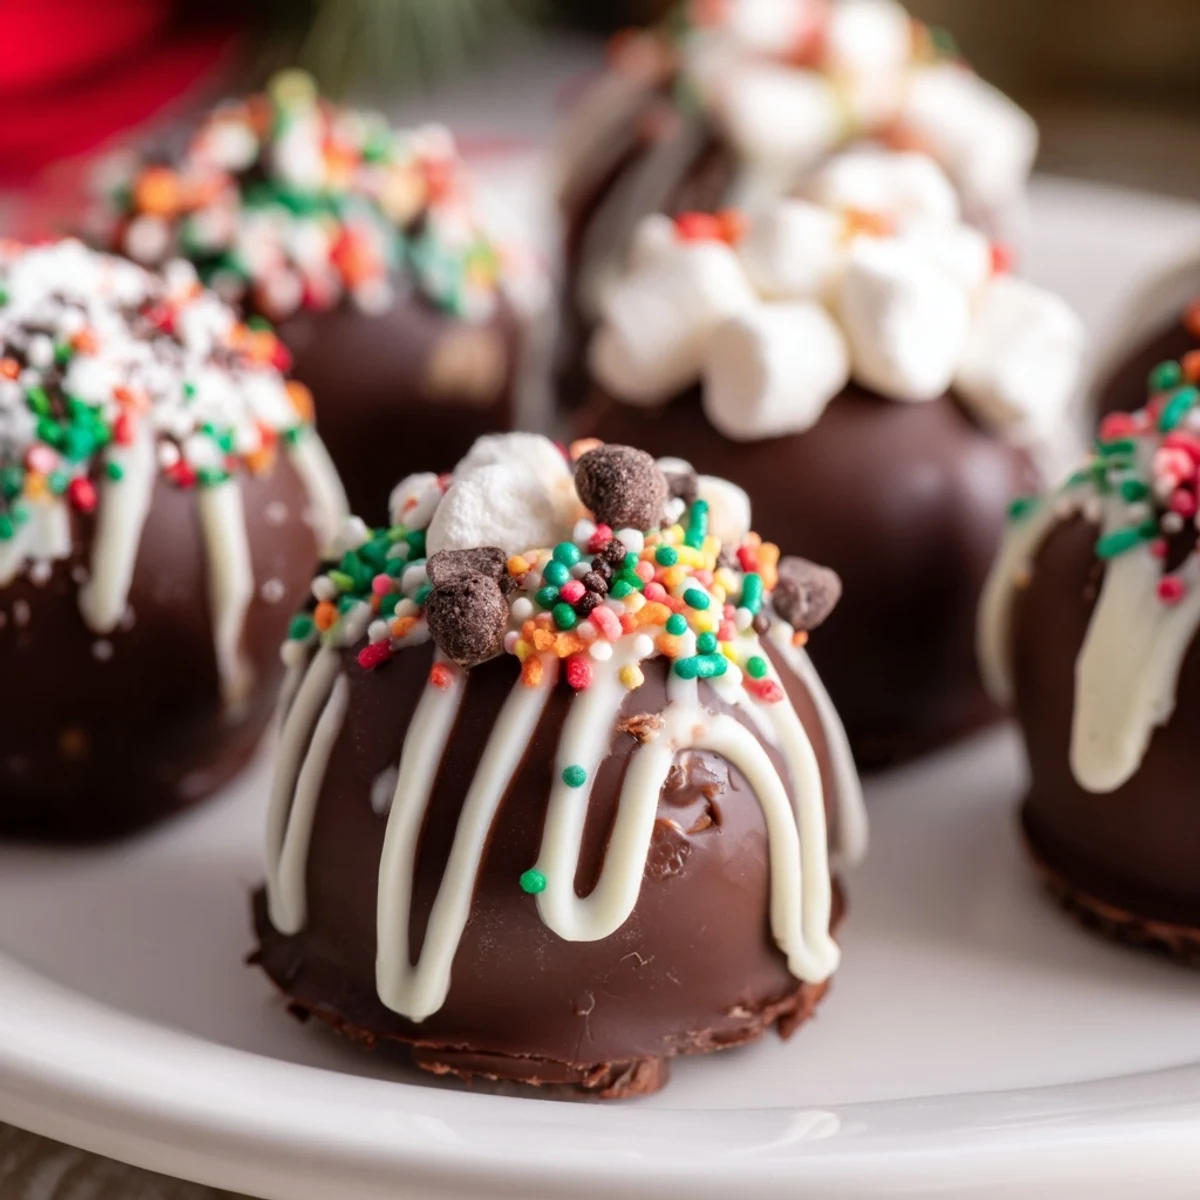
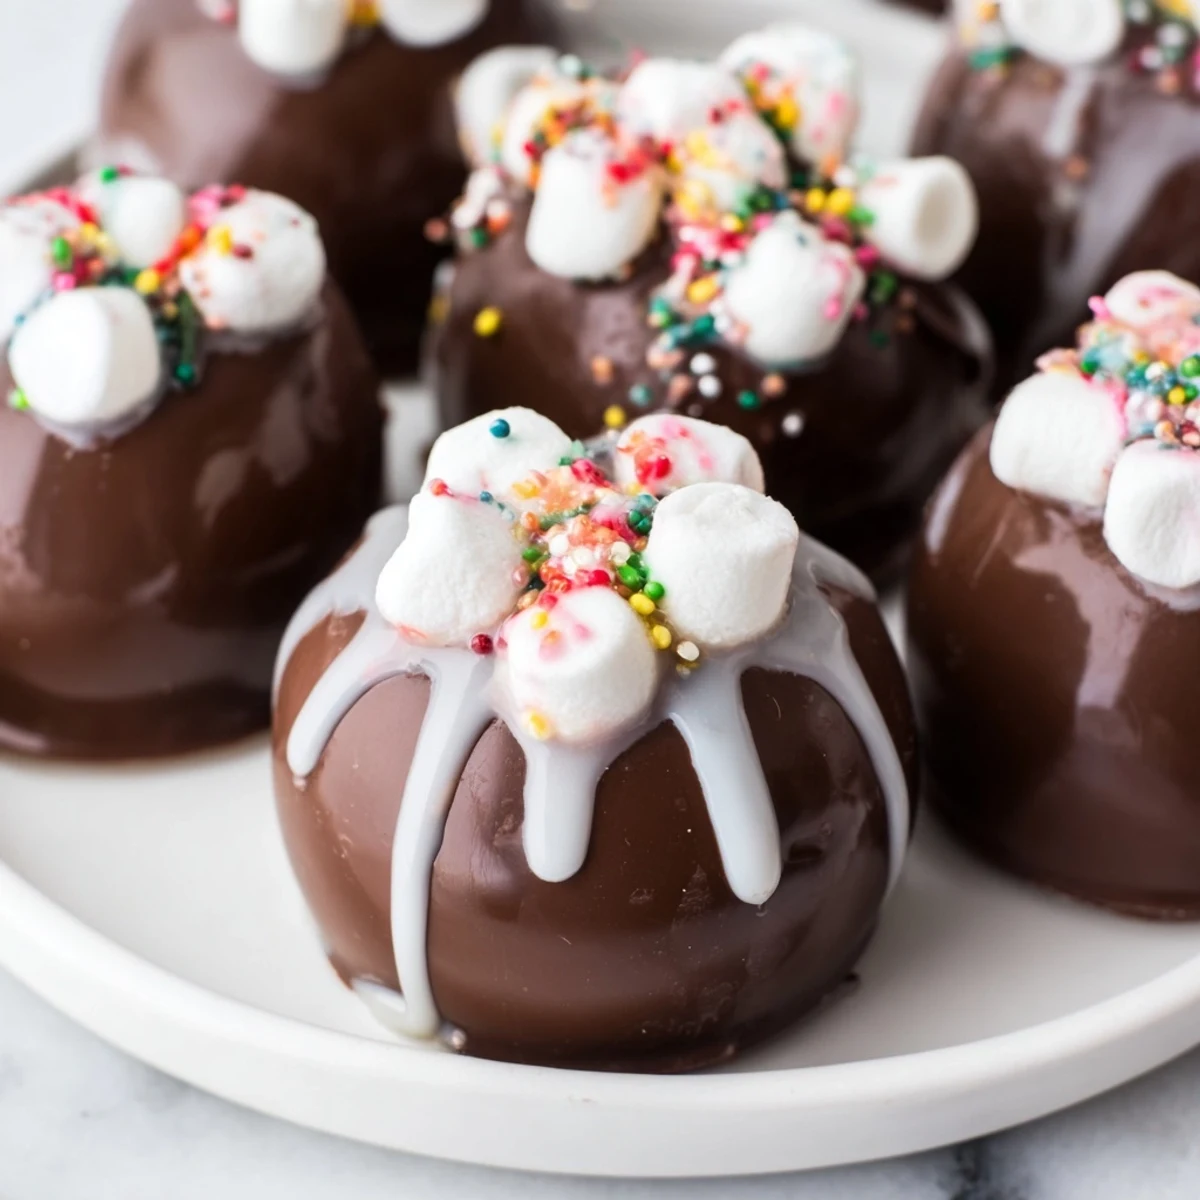
Save These chocolate spheres offer a luscious blend of semi-sweet or milk chocolate shells filled with instant cocoa mix and mini marshmallows. Crafted using silicone molds, each sphere is carefully layered with melted chocolate for sturdiness, chilled, and then filled. Sealed with gentle warmth and optionally decorated with melted white chocolate and sprinkles, they bring a festive touch to your hot cocoa experience. Perfect for cozy moments, this creation balances rich chocolate flavors with sweet, fluffy marshmallows.
I'll never forget the first time I made cocoa bombs—it was a quiet Sunday morning when I stumbled upon them online and thought they looked impossibly fancy. I gathered my courage, some chocolate, and my silicone molds, convinced I'd fail. But the moment I cracked open that glossy sphere and watched the hot water transform it into a swirl of cocoa and marshmallows, I understood the magic. Since then, these little chocolate vessels have become my favorite way to turn an ordinary Tuesday into something special, whether I'm making them for myself or surprising friends with a homemade gift they'll actually treasure.
I made these for my book club last month, and watching everyone's faces light up when they poured hot water over their bomb was worth every second of the 40 minutes it took. One friend swore she'd never made anything homemade before, but now she wants to make them for her whole family. That's when I realized these aren't just desserts—they're little moments of joy you can hold in your hands.
Ingredients
- High-quality semi-sweet or milk chocolate, chopped (300 g): This is where the magic starts. Don't skimp here—the chocolate flavor is the star of the show, so choose something you'd actually enjoy eating on its own. I learned the hard way that cheap chocolate tastes cheap, even when it's hidden inside a sphere. Semi-sweet gives you that classic hot chocolate richness, but milk chocolate works beautifully if you prefer something sweeter.
- Instant hot cocoa mix (6 tbsp total, 1 tbsp per bomb): This is your flavor foundation. Measure it generously—cocoa mix is what makes the water taste like a real hot chocolate, not just chocolate-flavored water.
- Mini marshmallows (60 g total, about 10 g per bomb): These are essential for that nostalgic, delightful texture that makes the whole thing feel indulgent. They float around in your mug and remind you that you're doing something fun, not just drinking coffee.
- Chocolate chips or sprinkles for filling (2 tbsp, optional): A small touch, but it adds visual interest and a little extra chocolate moment when you're savoring your drink.
- White chocolate, melted (50 g): Use this for the final drizzle if you want them to look professionally decorated. It contrasts beautifully against dark chocolate and adds an extra touch of elegance without much effort.
- Festive sprinkles (optional): These are purely for joy. Choose colors that make you happy—they're the final punctuation on a beautiful gift.
Instructions
- Melt your chocolate gently:
- Use a microwave in 30-second bursts, stirring between each one, or a double boiler over low heat. The goal is smooth, pourable chocolate without any scorched edges. You want chocolate that feels warm to the touch but not hot—it should coat your spoon luxuriously.
- Paint the first chocolate layer:
- Using a pastry brush or the back of a spoon, coat the inside of your silicone molds with a generous, even layer. Work thoughtfully around the curves, making sure there are no thin spots where the chocolate might crack later. This is meditative work—take your time.
- Chill and set:
- Give the molds 10 minutes in the refrigerator. You'll see the chocolate firm up, becoming opaque and solid. This is when you know it's ready for the next layer.
- Add the reinforcement layer:
- Paint on a second layer of chocolate to ensure your shells are sturdy enough to hold the filling without breaking. This is your insurance policy. Chill for another 10 minutes.
- Release your shells carefully:
- Let the molds sit at room temperature for a minute or two, then gently flex the silicone and ease each shell out. They should pop out smoothly if your chocolate is set but not rock-hard. If they resist, refrigerate a few more minutes.
- Fill with intention:
- Take 6 of your chocolate halves and add 1 tablespoon of cocoa mix, about 10 grams of marshmallows, and a few chocolate chips if you're using them. Don't overfill—you need room to seal the two halves together without it spilling out.
- Seal the two halves:
- Here's where the magic happens and where I learned something important: warm a small plate in the microwave for about 15 seconds until it's warm to the touch. Press the edge of an empty shell gently against the warm plate for just a second—you want just enough melting to create a seal, not so much that it droops. Immediately press it onto your filled half and hold firm for 10 seconds. The warm plate melts the chocolate just enough for them to bond. Repeat with all six bombs.
- Decorate with flair:
- Drizzle white chocolate over the seams and anywhere else that calls for it, then sprinkle while the chocolate is still wet. Let them sit at room temperature until the white chocolate sets—about 15 minutes.
 Save
Save There's something almost sacred about handing someone a cocoa bomb. It's a small luxury they can hold, a secret waiting to be discovered, a moment of care wrapped in chocolate. My neighbor still talks about the time I brought these over on a snow day with a note about how to use them, and now she makes them for everyone she knows.
Chocolate Selection Wisdom
The chocolate you choose sets the entire tone for these bombs. I used to think any chocolate would work, but the difference between a quality semi-sweet and a cheap brand is the difference between a luxury gift and a candy-maker's shortcut. Semi-sweet chocolate gives you that deep, slightly sophisticated flavor that reminds you of real hot chocolate, while milk chocolate leans into sweetness and nostalgia. Dark chocolate pushes everything into grown-up territory—rich, almost bitter, beautiful for someone who loves their cocoa seriously. For white chocolate versions, the sweetness should sing without being cloying. Visit a good chocolate supplier if you can, or order online from a specialty shop. Your taste buds will thank you, and so will everyone who receives one of these as a gift.
Creative Flavor Variations
Once you master the basic cocoa bomb, the variations become endless and genuinely fun to experiment with. I've made a peppermint version by crushing candy canes and mixing them with the cocoa powder, and the result felt like drinking a winter day. You can do the same with instant espresso powder for a mocha version, or add a teaspoon of vanilla extract to the cocoa mix for something warmer and more sophisticated. Some friends have requested salted caramel chocolate shells with dulce de leche stirred into the filling, and while I haven't mastered that one yet, it's on my list. The beautiful thing about these is that once you understand the structure, you can play endlessly with what goes inside. The only rule is that you're making something you'd actually want to drink.
Storage, Gifting, and Final Magic
Keep your finished cocoa bombs in an airtight container at room temperature away from direct sunlight—they'll stay glossy and beautiful for up to two weeks. When you're ready to use one, place it in a mug, pour 8 ounces of hot water or warm milk over it, and watch the chocolate dissolve while the marshmallows float and swirl. The moment of revelation, when everyone sees what happens, never gets old.
- Package them in small boxes or mason jars with simple instructions for friends—they make stunning gifts that feel far more thoughtful than their 40 minutes of work suggests
- If you want to make a larger batch, these freeze beautifully in an airtight container for up to a month, though they taste best at room temperature
- Add a handwritten note with your filling ingredients so recipients know exactly what they're getting—it's the thoughtful detail that transforms a gift
 Save
Save These cocoa bombs remind me that the best gifts aren't always complicated—they're the ones made with attention and shared with generosity. Every time someone opens one, you're giving them a moment of pause in their day, and that's powerful kitchen magic.
Common Questions
- → What type of chocolate works best for the shells?
-
Semi-sweet or milk chocolate melt smoothly and set firmly, making them ideal for sturdy shells. Dark chocolate can also be used for a richer taste.
- → How do I prevent the chocolate shells from cracking?
-
Coating the molds twice with melted chocolate and chilling between layers helps ensure strength and prevents cracking when unmolded.
- → Can I add flavors to the cocoa filling?
-
Yes, including crushed peppermint candies or flavored cocoa mixes can provide unique twists and enhance the filling’s taste.
- → What’s the best way to seal the spheres together?
-
Gently warming the edge of an empty chocolate half against a warm plate softens it slightly, allowing a smooth seal to a filled half.
- → How should these chocolate spheres be stored?
-
Store them at room temperature in an airtight container for up to two weeks to maintain freshness and texture.
