 Save
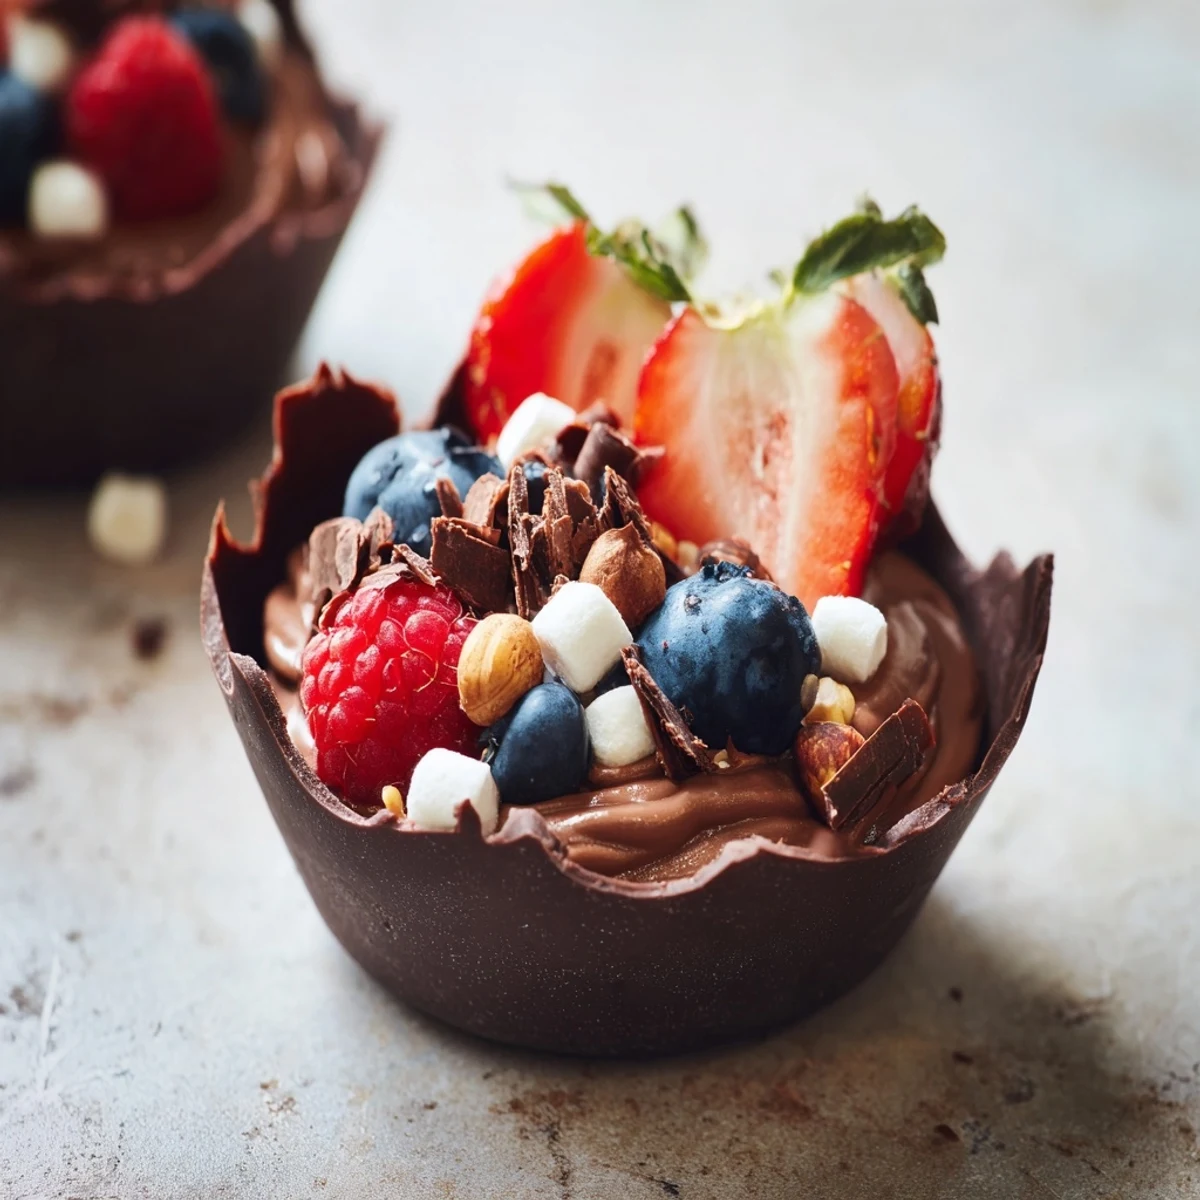
Save Create stunning dessert cups featuring handmade dark chocolate shells filled with silky chocolate mousse. These individual portions combine the intensity of dark chocolate with the freshness of mixed berries and the satisfying crunch of nuts, marshmallows, and chocolate curls. Perfect for entertaining, these grazing cups offer a luxurious touch to any dessert table while being surprisingly simple to prepare at home.
The first time I made chocolate cups, my kitchen smelled like a chocolaterie. I was hosting a dinner party and wanted something impressive but doable, and watching guests crack through that shell to reveal mousse inside was absolutely worth the effort.
Last summer I set up a dessert grazing table with these cups as the centerpiece. My friend Sarah actually gasped when she saw them, and later confessed she ate three because she could not stop going back for just one more bite of that mousse.
Ingredients
- Dark chocolate (at least 60% cocoa): Higher cocoa percentage means your cups will snap beautifully and the mousse will have sophisticated depth without being too bitter
- Heavy cream: Must be very cold before whipping or your mousse will not hold its shape properly
- Powdered sugar: Dissolves seamlessly into the cream unlike granulated sugar which can leave grainy texture
- Vanilla extract: Pure vanilla makes all the difference here since there are so few ingredients
- Fresh mixed berries: The tart fruit cuts through all that rich chocolate and keeps every bite interesting
- Chopped nuts: Toast them lightly beforehand for that warm nutty fragrance that people notice but cannot quite place
- Mini marshmallows: These add playful texture and remind everyone that dessert should be fun
- Chocolate curls: Use a vegetable peeler on a room temperature chocolate bar for effortless elegant curls
Instructions
- Melt and coat the cups:
- Work in short bursts when melting chocolate, stirring every 20 seconds to prevent seizing. Paint the melted chocolate up the sides of your liners thoroughly because any thin spots will crack when you try to remove them later.
- Chill until set:
- Let the chocolate firm up completely in the refrigerator for at least 20 minutes. Gently peel away the liners starting at the top edge, moving slowly to avoid breaking your hard work.
- Whip the cream base:
- Chill your mixing bowl and whisk in the freezer for 10 minutes before whipping. Stop when soft peaks form because overwhipped cream will make folding in the chocolate nearly impossible.
- Combine and fold:
- Stir a dollop of whipped cream into the melted chocolate first to warm it up and lighten the texture. Then gently fold the chocolate mixture back into the remaining cream using a spatula, cutting through the middle and scooping from the bottom until no streaks remain.
- Fill and garnish:
- Pipe or spoon the mousse into each chocolate cup until they are about two thirds full. Arrange your toppings in a artful tumble rather than perfectly placed because these look best when they are abundant and generous.
- Final chill:
- Refrigerate the assembled cups for at least 20 more minutes so the mousse sets completely. Serve them cold but let them sit out for 5 minutes before eating so the chocolate shell softens slightly for the perfect crack.
 Save
Save These became my go to contribution for potlucks after my neighbor asked for the recipe three different times. Something about the interactive element of breaking through chocolate makes people slow down and really savor each bite.
Making Ahead
You can prepare the chocolate cups up to 2 days in advance if stored in an airtight container at room temperature. The mousse holds well for 24 hours in the refrigerator but I recommend assembling them no more than 4 hours before serving for optimal texture.
Chocolate Selection
I used to buy whatever baking chocolate was on sale until I did a side by side taste test. Now I splurge on Valrhona or Guittard for the cups since that is what people taste first, though the mousse can get away with slightly less expensive chocolate.
Serving Suggestions
Set up a grazing station with these cups as the star and let guests customize their own toppings from small bowls of extras. This turns dessert into an activity and always sparks the best conversations around the table.
- Pair with espresso or dessert wine to balance the richness
- Offer small forks alongside because these can get messy
- Keep extra berries nearby for guests who want to lighten their portion
 Save
Save There is something deeply satisfying about making something so stunning from such simple ingredients. Watch your guests faces when they take that first crack through the chocolate shell.
Common Questions
- → How far in advance can these be prepared?
-
Best made on the day of serving for optimal texture, though chocolate cups can be prepared 2-3 days ahead stored in an airtight container. The mousse holds up well for 24 hours refrigerated.
- → What chocolate percentage works best?
-
Dark chocolate with at least 60% cocoa provides the ideal balance of intensity and sweetness. Higher percentages up to 70% work wonderfully for sophisticated palates.
- → Can these be made dairy-free?
-
Yes, substitute the heavy cream with full-fat coconut cream and use dairy-free dark chocolate. The texture remains luxurious while accommodating dietary restrictions.
- → What's the best way to achieve smooth chocolate cups?
-
Ensure your chocolate is properly tempered by melting gently and allowing it to cool slightly before coating. Apply thin, even layers and chill thoroughly between coats for sturdy results.
- → How should leftovers be stored?
-
Refrigerate assembled cups in an airtight container for up to 24 hours. Note that fresh berries may release moisture over time, so add them just before serving if possible.
