 Save
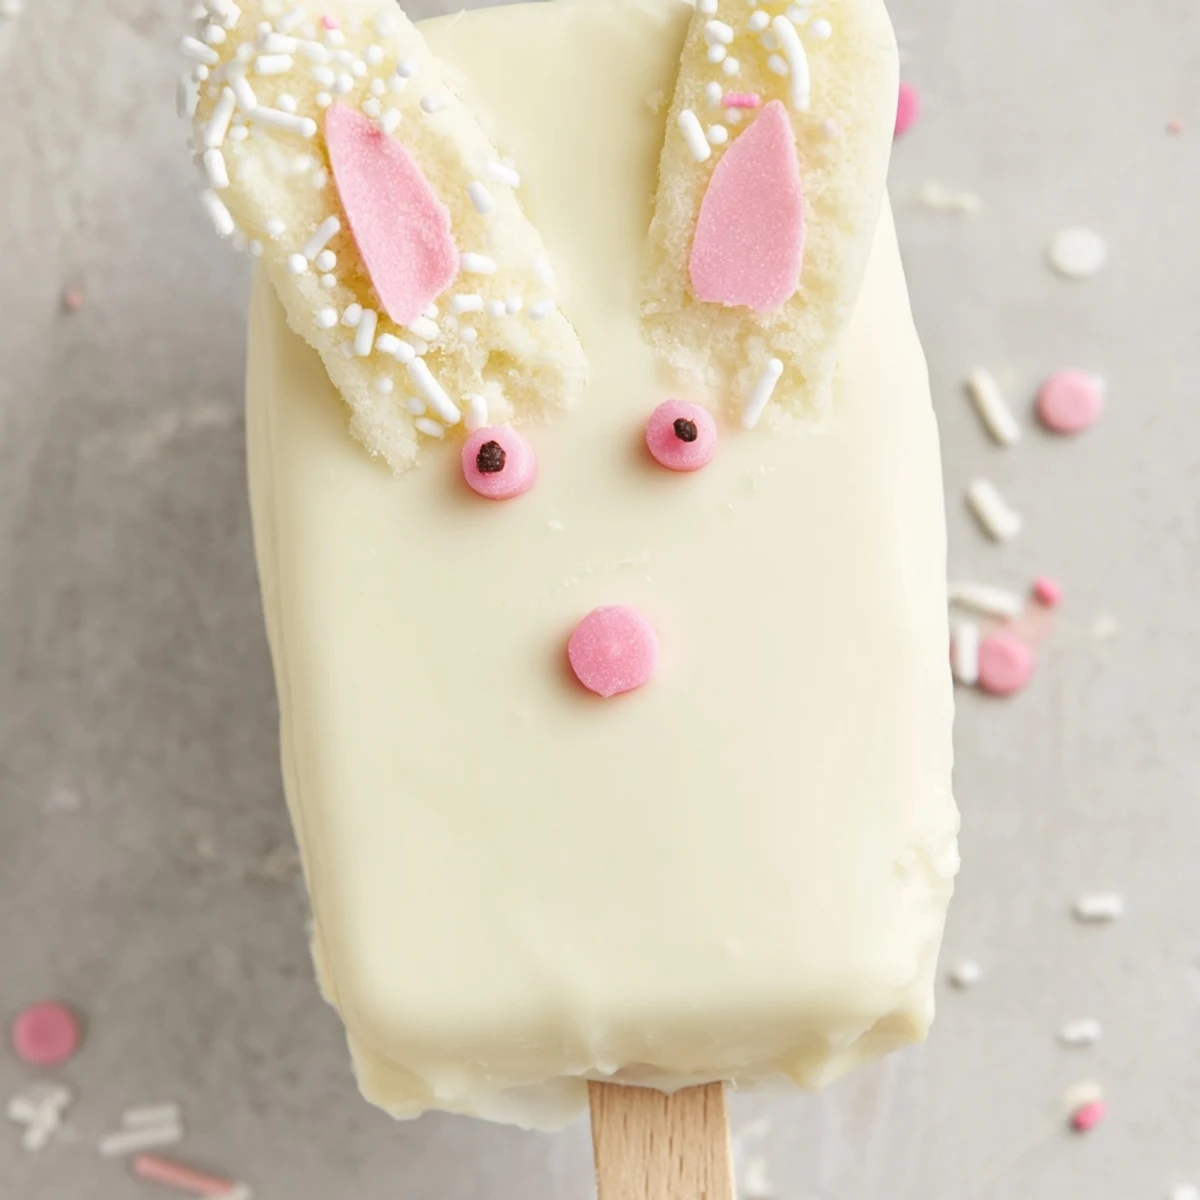
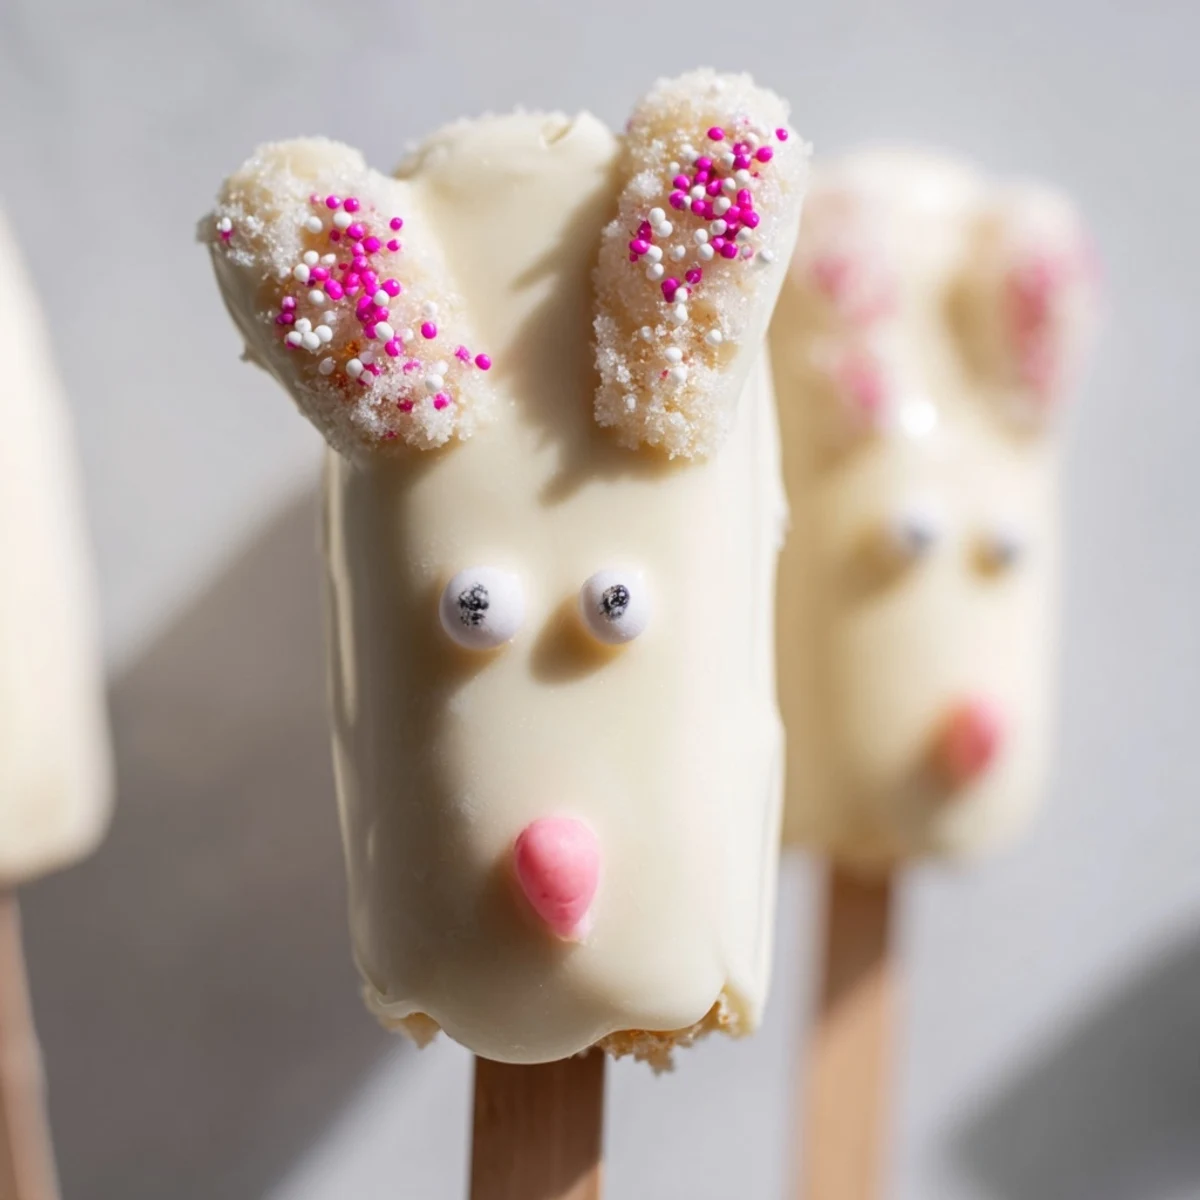
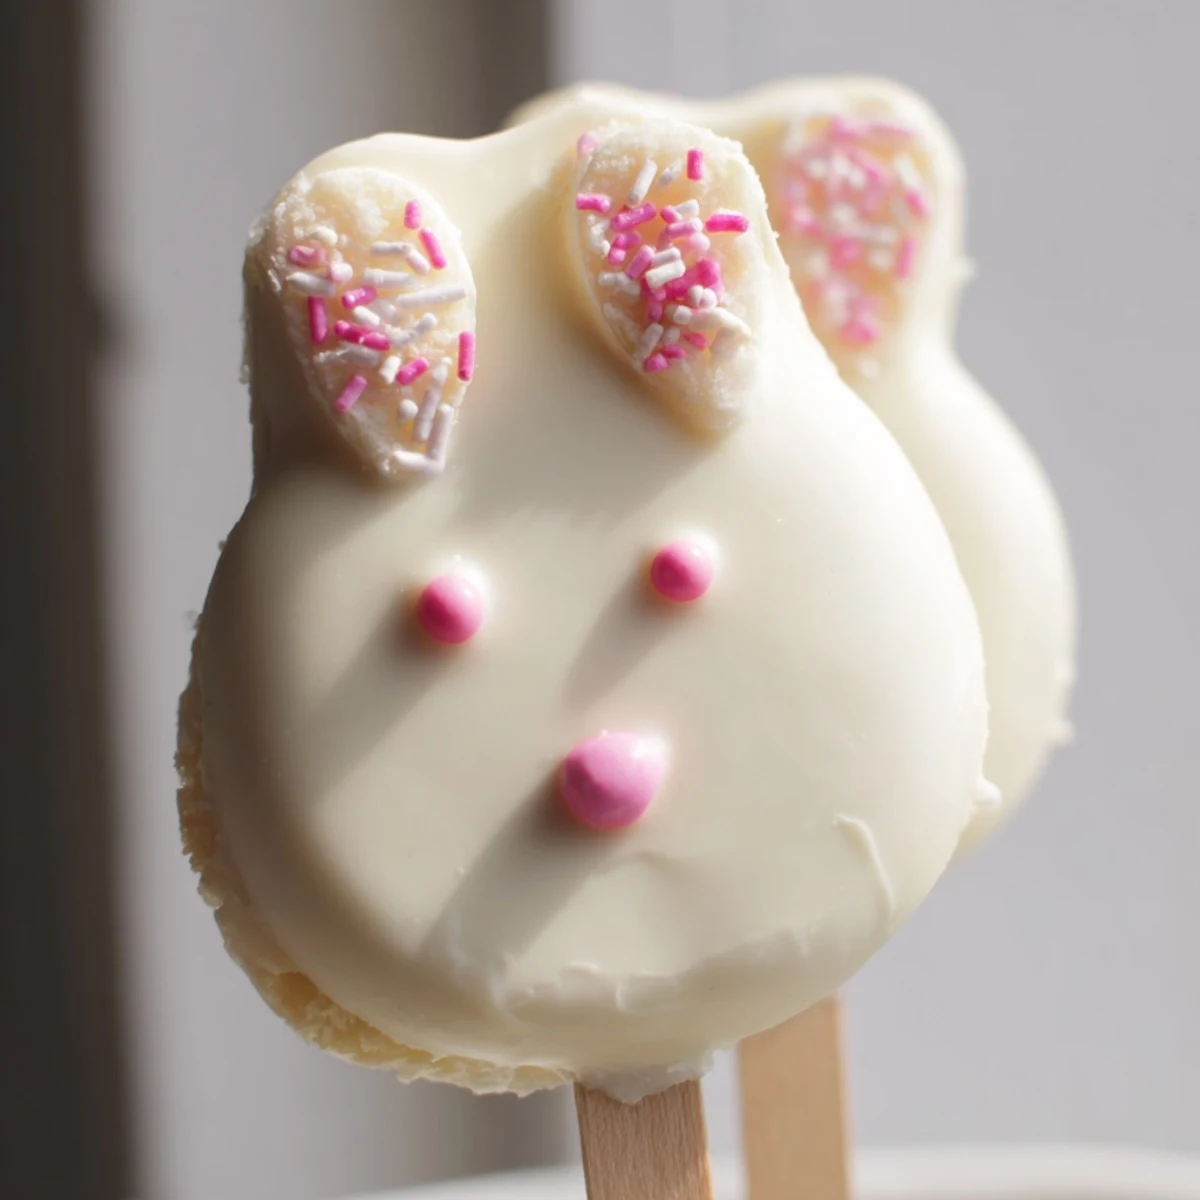
Save These delightful bunny cakesicles bring whimsical charm to your Easter dessert table. Start by combining vanilla cake crumbs with cream cheese, butter, and powdered sugar until you achieve a smooth, moldable dough. Shape into flattened ovals resembling bunny faces, insert sticks, and chill until firm.
Dip each cake pop into melted white chocolate, ensuring complete coverage. While the coating remains soft, add personality with candy eyes, pink fondant noses, and perky ears. The result combines the nostalgic comfort of cake pops with festive spring aesthetics.
Customize by swirling pink food coloring through the white chocolate for a marbled effect, or experiment with chocolate cake for contrast. These handheld treats serve beautifully for Easter brunch, children's parties, or as edible gifts.
Last Easter my niece asked if we could make “bunny lollipops” and I had to Google what she meant. These cakesicles were born from that afternoon of kitchen experimentation, and now they’re requested months in advance. Something about cake on a stick makes everything taste better.
I made three dozen for a neighborhood egg hunt and watched grown adults fight over the last pink-eared bunny. My daughter decorated one with such wild sprinkles it looked like a party explosion, and that one disappeared first.
Ingredients
- Vanilla cake crumbs: The texture of slightly stale cake actually works better here—it absorbs the binding ingredients without becoming gummy
- Cream cheese: Room temperature is nonnegotiable for that smooth dough like consistency that holds everything together
- Unsalted butter: Adds richness without making the mixture too soft to handle
- Powdered sugar: Just enough sweetness to bind the crumbs without making them overly sweet
- Vanilla extract: Pure vanilla makes a noticeable difference in the final flavor profile
- White chocolate: Candy melts are easier for beginners but real white chocolate tastes infinitely better
- Edible gel food coloring: Liquid colors will seize your chocolate—gel is the only way to go
- Cakesicle sticks: Insert these before chilling or you will have melted chocolate everywhere when you try later
- Sprinkles and decorations: Have everything ready before you start dipping because the chocolate sets fast
Instructions
- Mix the cake base:
- Combine cake crumbs cream cheese butter powdered sugar and vanilla in a medium bowl until the mixture holds together when pressed
- Shape your bunnies:
- Divide into 8 portions and form flattened oval shapes slightly wider at the top for those signature bunny ears
- Add the sticks:
- Gently press a cakesicle stick about halfway into each shape then refrigerate for at least 20 minutes until firm
- Melt the coating:
- Heat white chocolate in 30 second bursts stirring between each until completely smooth and glossy
- Dip and decorate:
- Submerge each cake pop in chocolate tap off excess and immediately add decorations before the coating sets
 Save
Save My sister in law texted me at midnight the night before Easter last year panicked because she had forgotten to bring dessert. I talked her through these over the phone and she showed up with a box of slightly lopsided but entirely adorable bunnies that the kids talked about for weeks.
Choosing Your Coating
White chocolate is traditional but I have used pastel colored candy melts for a rainbow bunny effect. The key is melting slowly and stirring frequently—burnt chocolate has a smell that lingers in your kitchen memory forever.
Making Ahead
The undipped cake balls can be frozen for up to a month then thawed in the refrigerator before coating. I learned this after accidentally making triple the amount I needed for a small gathering.
Decoration Ideas
Fondant ears look impressive but pretzel sticks dipped in pink chocolate are equally charming and much faster. The best decorations are the ones you can actually execute without stress.
- Set up a decorating station with small bowls of toppings before you start
- Keep a clean toothpick handy for repositioning eyes or noses that slide
- Work on one cakesicle at a time so the chocolate stays workable
 Save
Save These little bunnies have become the one Easter tradition my kids actually help with willingly. Something about sprinkles and edible googly eyes brings out the creative side in everyone.
Common Questions
- → How far in advance can I make bunny cakesicles?
-
Prepare these treats up to three days before your event. Store them in an airtight container in the refrigerator, maintaining freshness and texture. Bring to room temperature 30 minutes before serving for optimal flavor and coating consistency.
- → Can I use different cake flavors?
-
Absolutely! While vanilla provides classic appeal, chocolate, lemon, red velvet, or funfetti crumbs work wonderfully. Match coating colors accordingly—dark chocolate pairs beautifully with red velvet, while lemon complements white or pastel coatings.
- → What if I don't have cakesicle molds?
-
Simply shape the cake mixture by hand into flattened oval bunny faces. This free-form method creates charming rustic variations. If uniform shapes matter, outline your desired shape on parchment paper as a guide while molding.
- → How do I prevent the sticks from falling out?
-
Ensure the cake mixture is thoroughly chilled before inserting sticks. Dip each stick tip into melted chocolate before inserting—this acts as adhesive once cooled. Let set completely in the refrigerator before dipping in coating chocolate.
- → What decorations work best for bunny faces?
-
Candy eyes provide instant personality. Create noses from pink fondant dots, sprinkles, or mini marshmallows. For ears, use fondant cutouts, pretzel sticks dipped in chocolate, or modeling chocolate. Edible food markers add whiskers and final details.
- → Can I freeze these for later?
-
Freeze undecorated cakesicles for up to one month. Wrap individually in plastic wrap, then place in freezer bags. Thaw overnight in the refrigerator before coating and decorating. The chocolate coating may develop condensation—allow to reach room temperature completely before serving.
